
BurpSuite Overview
A high-level walk-through of the BurpSuite tool. A much needed for the application security pentesting


In this post, we will walk through BurpSuite and start learning the concepts that we will be using, and I will be covering more about the features when needed during our assessments.
If you haven't installed the Burp Suite, refer below and ensure the tools is successfully installed.
 Raghunath G
BurpSuite Overview
Let's launch the BurpSuite community edition using the steps from the previous article.
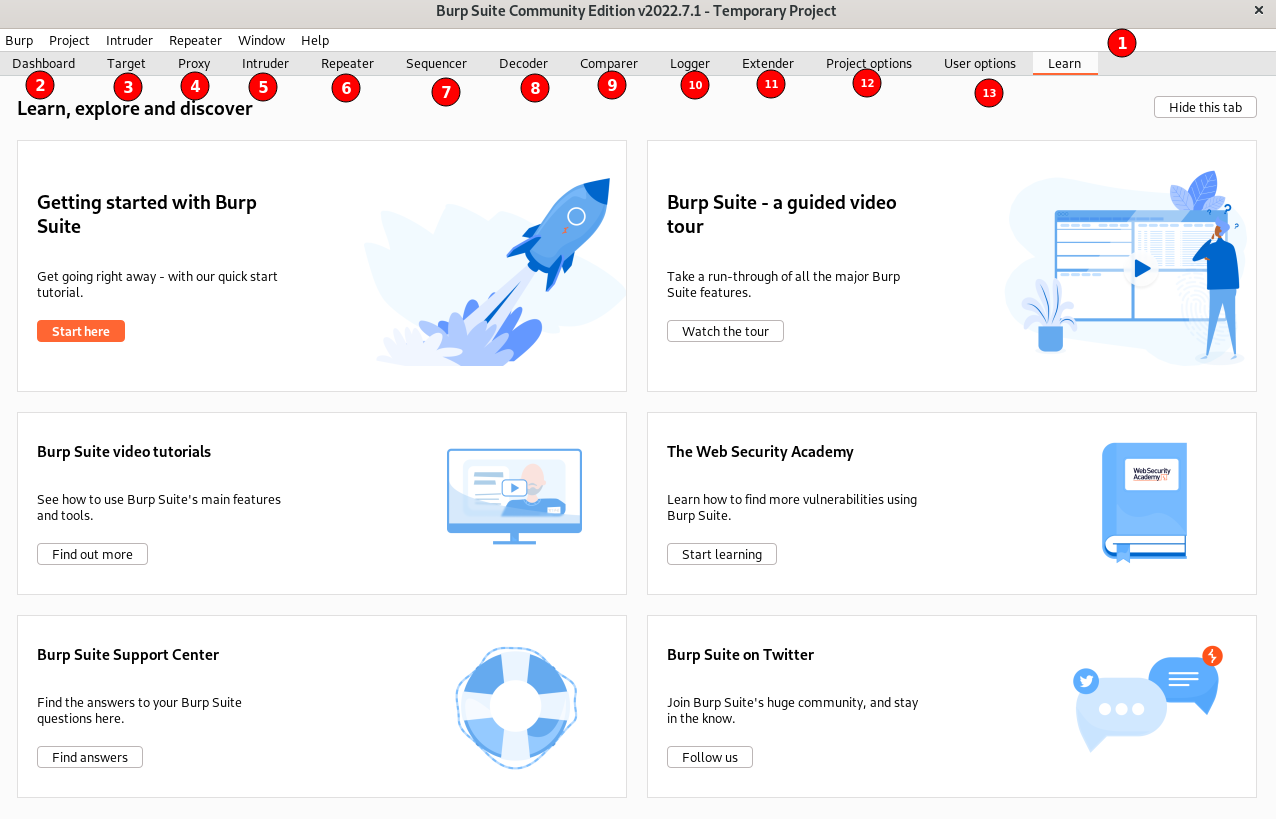
At launch, the “Learn” tab will be selected and all the information required for learning and using the tool will be displayed as shown below. You can always explore the text and video tutorials provided by the tool.
2. Dashboard
A place where you can see information about the crawling and issues identified.
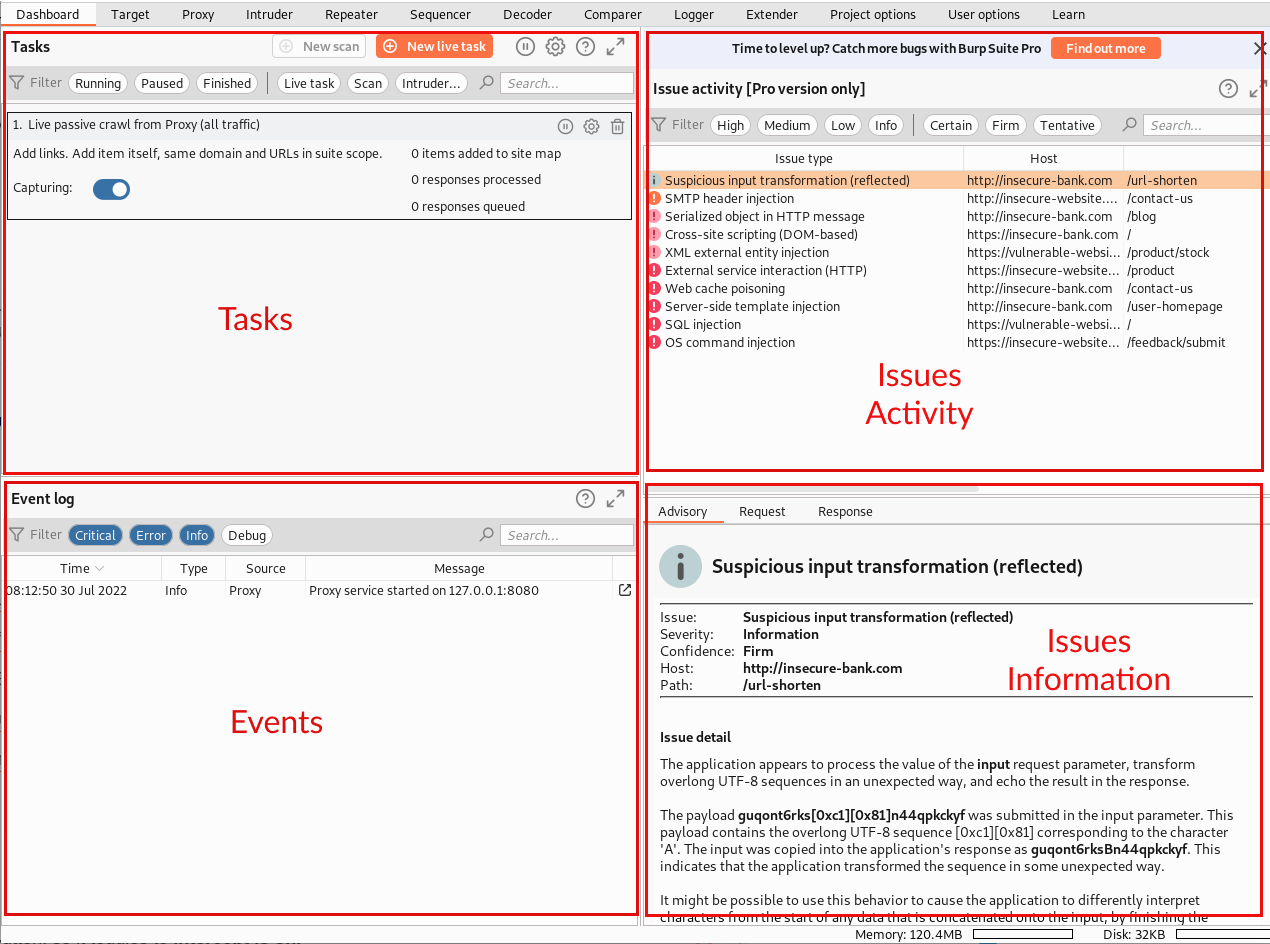
Tasks section is a place where we can configure crawling for all websites we visit and keep an eye on their status. By default, the tool helps us by enabling “Live passive crawl”.
Passive crawl means when I visit any website using the Proxy tool, it starts looking at all the HTML content and collects page URLs, parameters, etc. keeps building the sitemaps locally for our knowledge base.
This is similar to the daemon service, it will keep on continuously running from the start of the BurpSuite tool, you can disable it by setting the “Capturing” off.
Event Log section gives you information about the BurpSuite tool itself like services started, error information if it is unable to load any extender plugin, network issues, and warning about the tool which might impact your work.
Issues Activity is a place where the BurpSuite scanner will display all the vulnerabilities identified by the tool
Issues Information section where you can see a detailed description of the security bug reported and the proof of concept of how the tool was able to identify it as a security defect.
The above issues sections are only available in the BurpSuite Professional edition.
3. Target
The target tab consists of three items, site map, scope, and issue definitions.
Site map is the place where you can see all the URLs, and parameters information collected by the crawler. As we can only see the status in the dashboard, here you can find the detailed information post crawling of websites.
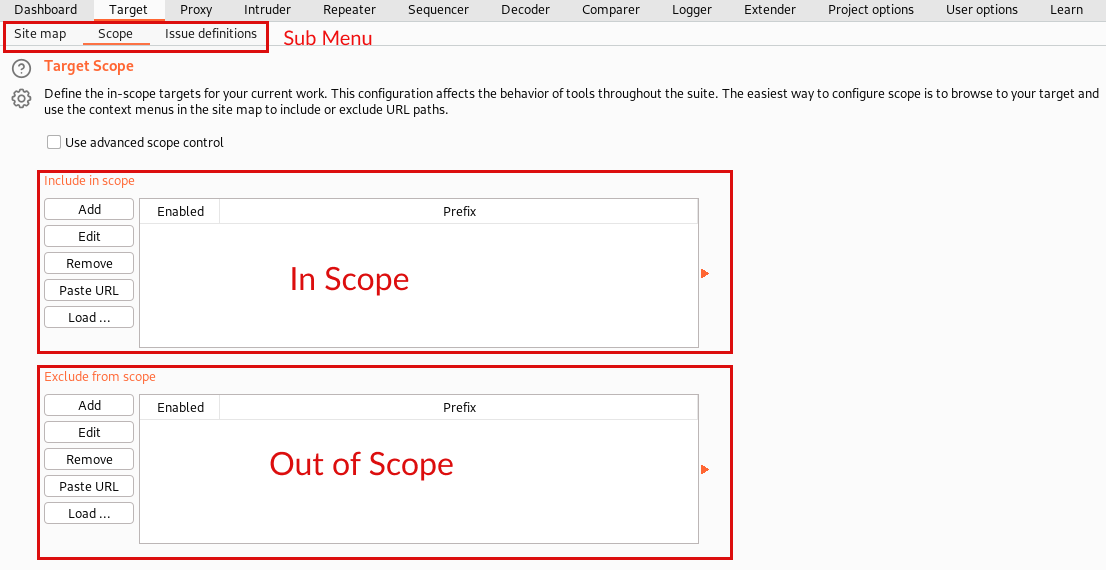
Scope is the most important section while performing any security assessments or pentesting.
Be very clear about which particular websites are part of your scope for security testing, and add them to the “In Scope” section. (Example: securityarray.io as in scope)
Anything which is not supposed to be tested on a particular website excludes all of them from testing by adding it to the “Out of Scope” section. (Example: payments.securityarray.io)
Always keep in mind, that only perform security testing on the scope mentioned to you. Violating the terms and conditions of the scope of your assessments will lead to banning you, or sometimes you might face legal challenges from the owners of the website.
Issue definitions are like a vulnerabilities inventory of BurpSuite about all the vulnerabilities it can identify. The security defects are all categorized from informational to High severity.
This is also a good place to keep referring to vulnerabilities information.
4. Proxy
This is the core feature of the BurpSuite tool.
In short, once you configure the BurpSuite proxy with your web browser, Any traffic which goes from your web browser to the web server will be viewable in your BurpSuite proxy tab.
Not only view, but you can also intercept and modify any request before it goes to the server.
Generally, the browser limits our capabilities to only view the HTTP messages for debugging purposes, by using this proxy tool as an intermediate you can overcome those limitations
In security, we often keep on saying “Validate every piece of data which is coming from the client side”. As it can be tampered with.
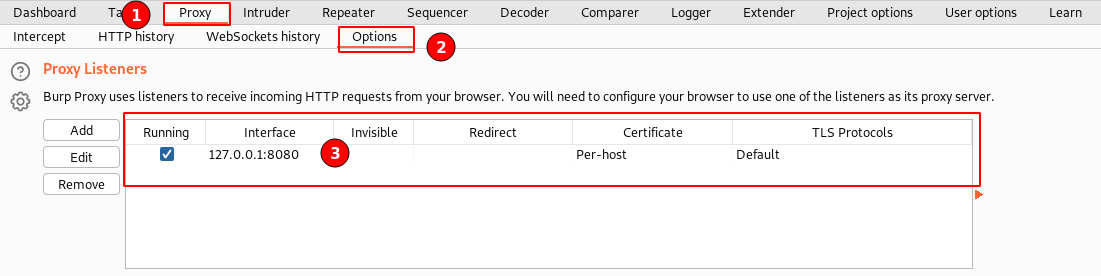
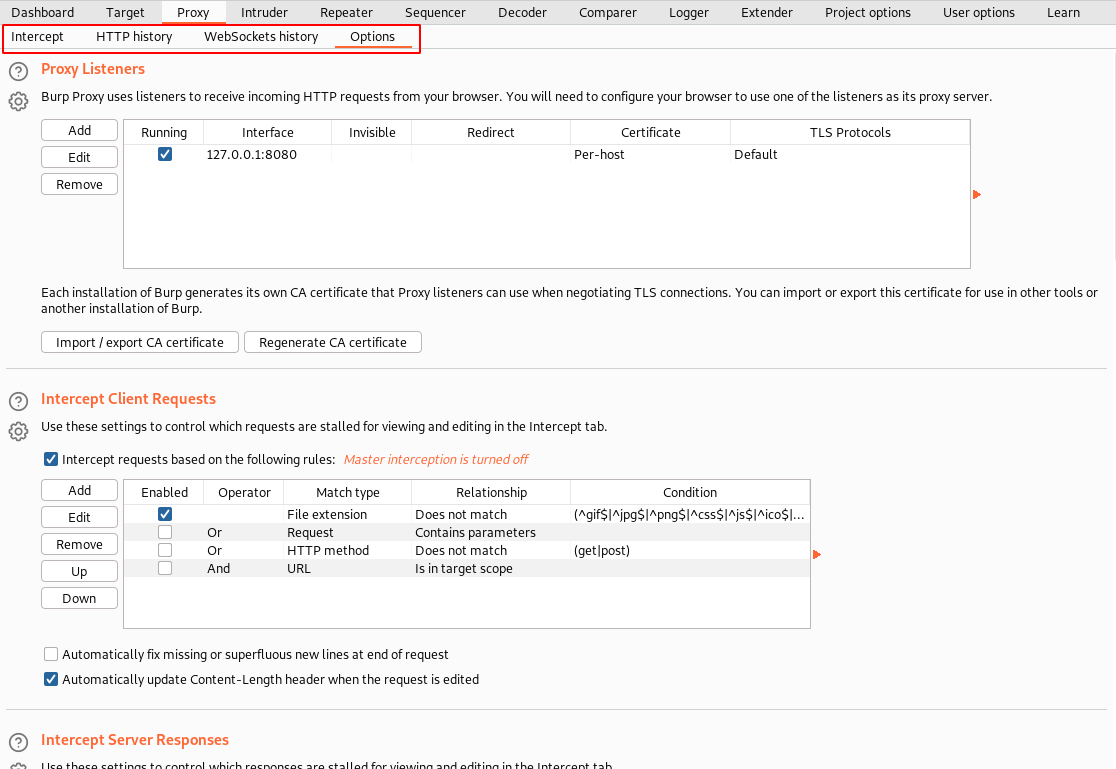
After launching the BurpSuite tool, the first thing to ensure your proxy listener is started and in a running state.
Navigate to the “Proxy” tab ⇾ “Options” ⇾ “Proxy Listeners”. As shown in the above screenshot.
HTTP History is a location where all the ongoing HTTP traffic information can be viewed.
Intercept tab is where you have the option to enable for all or each request you want to change before sending to the web server, or turn it off if you don't want to modify any requests.
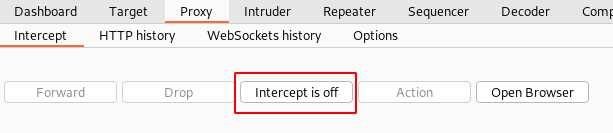
By default, the intercept feature is enabled at startup.
Navigate to the “Proxy” tab ⇾ “Options” ⇾ “Intercept Client Requests”. As shown in the above screenshot.
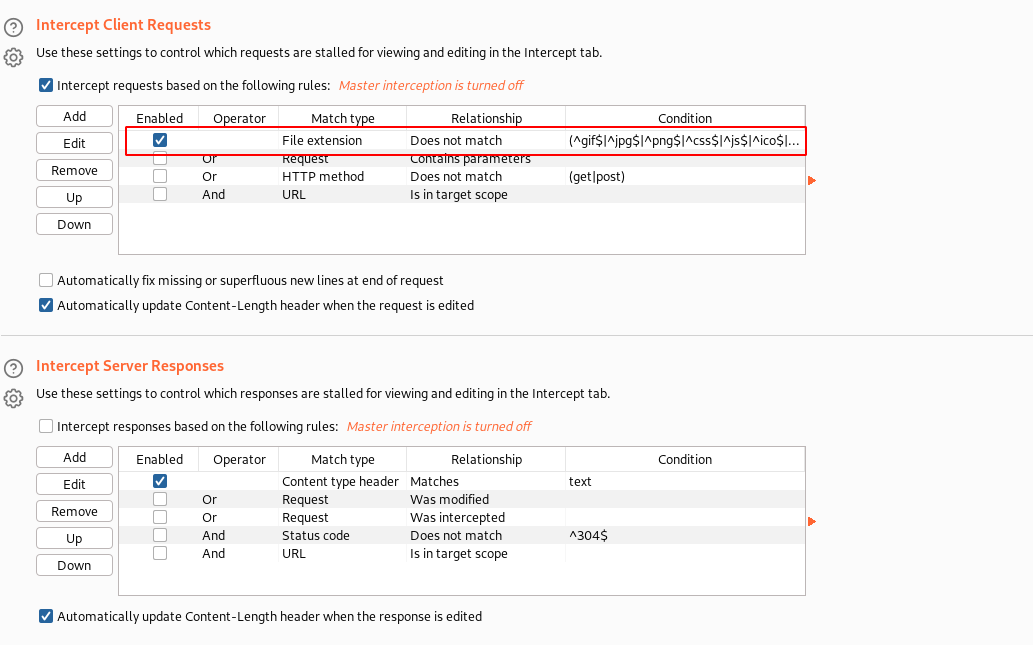
You would be able to see the Intercept requests enabled, and the rule set of what all requests the Burp Proxy will intercept.
Similarly, we can enable the intercepting of responses as well if you want to see it in the proxy itself.
Additionally, the Intercept tool also does contain an inbuilt Chromium browser which is preconfigured.
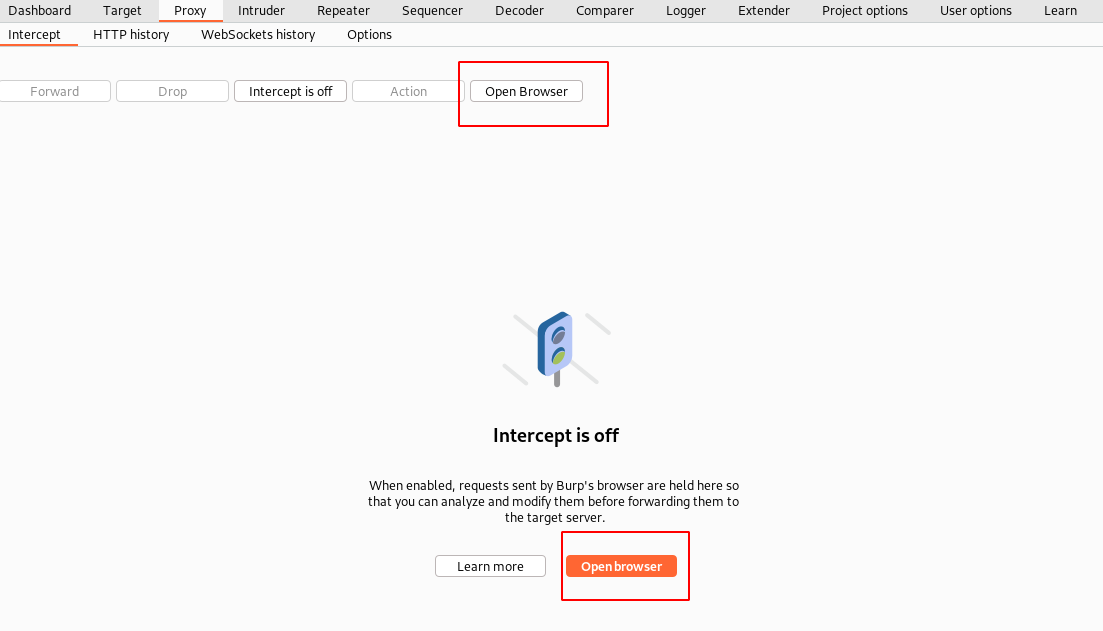
Launch the browser and start accessing any website, you should be able to see all the data being seeded into your BurpSuite Proxy.
In short, the takeaway from the proxy tool is to configure with any web browser, and we can start playing with the requests sent from the client to the server.
5. Intruder
This is one of the best features of the BurpSuite. Let's say you are having a situation where you need to test whether the application is using the default username and passwords for the server.
Yes, we do consider it a security bug if you use the default username and passwords on the server. Because anyone on the internet can guess it.
If our list of default usernames/passwords is less than 10, probably you can do it manually. But what if it's 100+ and beyond?
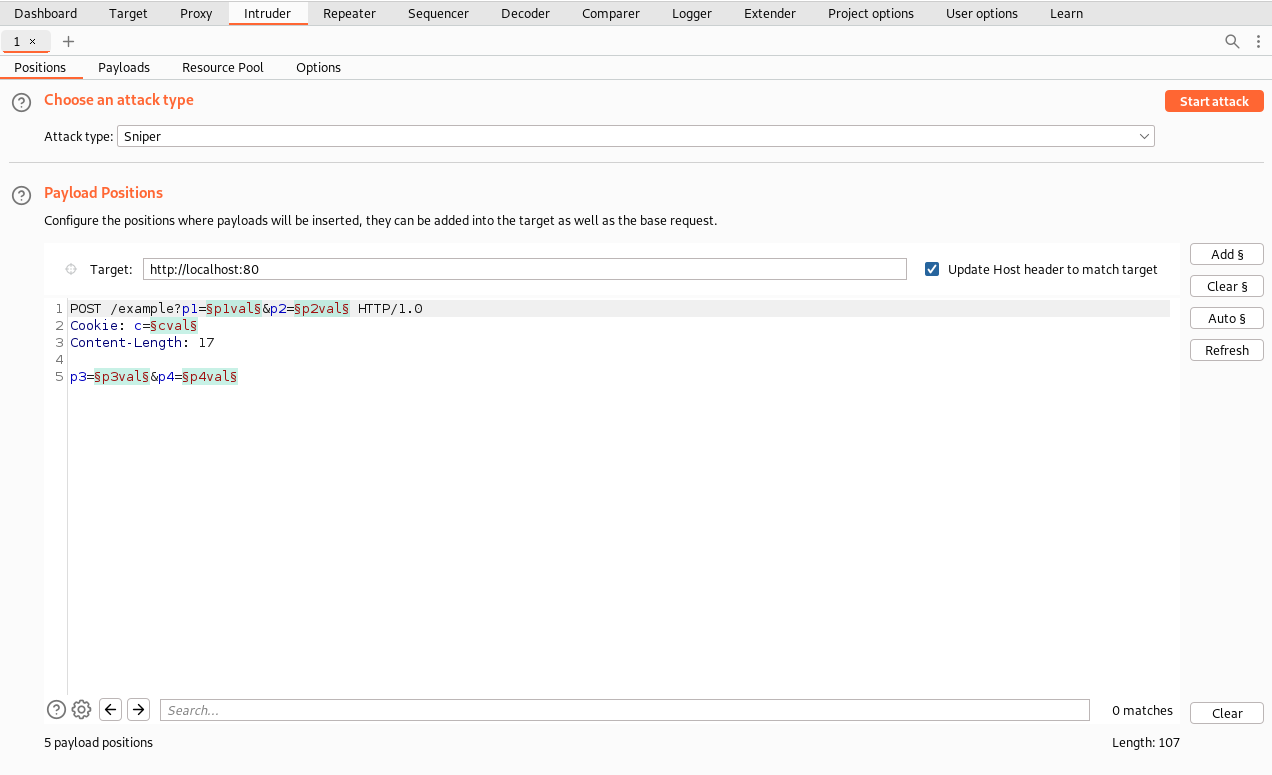
BurpSuite intruder is a big savior here. All, we need is to load the HTTP request, choose where you need to inject the modified values, set the payloads list (usernames or passwords list), and fire. That's it!
Intruder itself is a very big concept, which we will be covering in upcoming articles.
For now, all you need to remember is we can fine-tune custom payloads and reduce our manual efforts at the time of security testing for various scenarios using intruder.
6. Repeater
Based on the tab name, you could have probably guessed it is used to send repeated instructions!
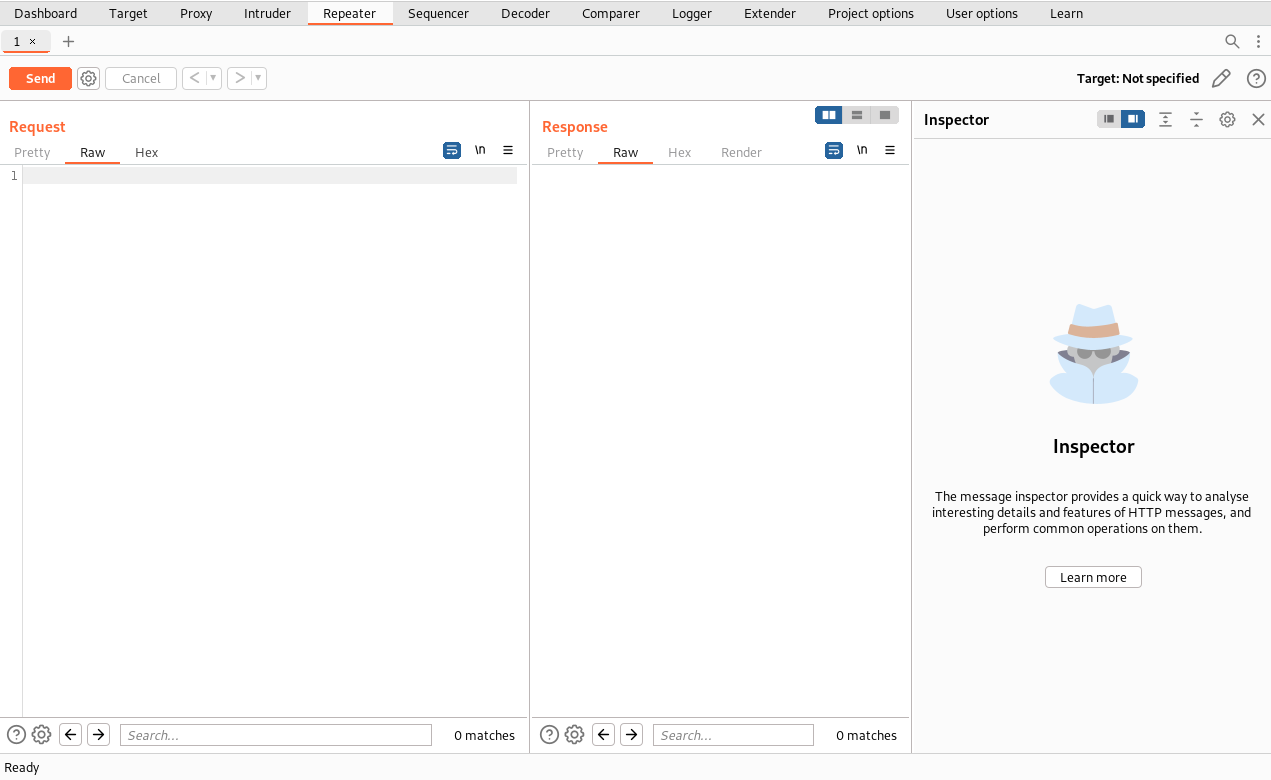
For example, you are testing a Password Strength functionality where you need to check if accepts only small characters, or only numerics or passwords with lengths less than 5, etc.
Here, we can do this from a web browser by accessing the application interface. But, don't you think it's too repetitive to always reload the page and enter a value, click submit and observe results?
Yes, the repeater saves us a lot of time. Just capture any request message and modify it before sending it to the server. You can see the response in the repeater tab itself. This saves us a lot of time when sending repeated requests.
7. Sequencer
As the name suggests, it is used to analyze a large sample of tokens to see whether it is predictable or completely randomized and unpredictable.
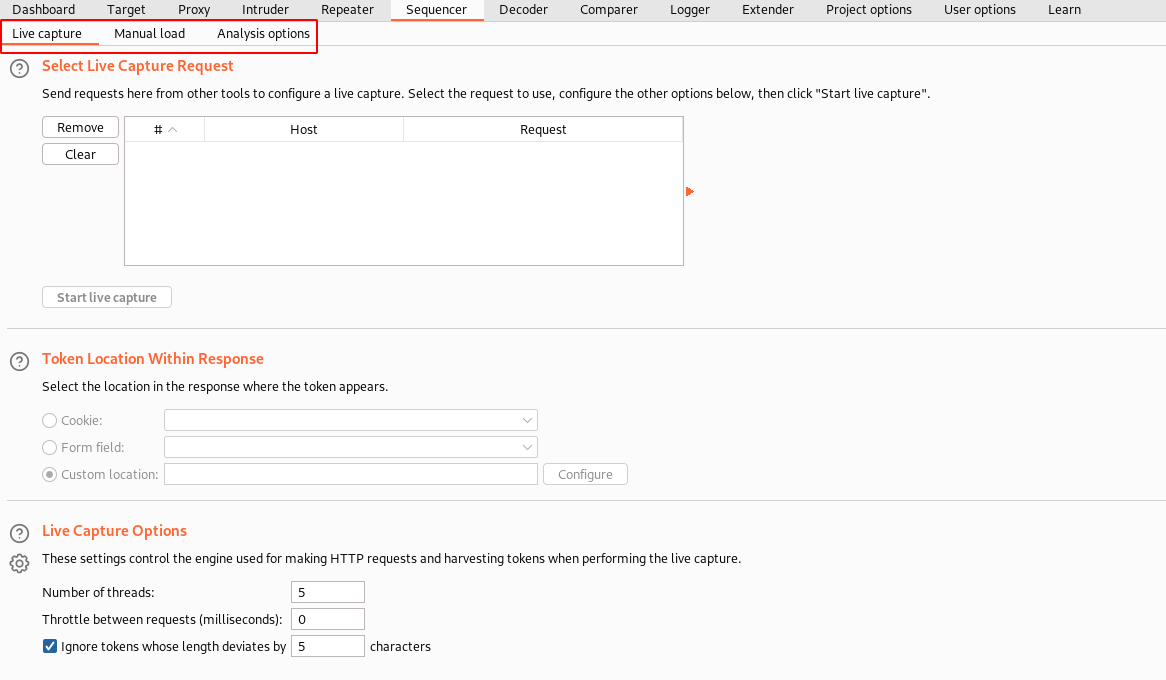
In general, this is used for analyzing the session tokens to find if it is predictable. If you can predict what the next session token will be set by the server, then this is considered a security flaw.
Live capture helps you to capture each request directly by interacting with the web server. Whereas Manual load is a place where you can give samples of the tokens you have collected for analyzing the strength of the tokens.
8. Decoder
You encountered a type of encoded hash and are not sure what type of hash it is and how to decode it during assessments. We even have a way to decode/encode it using the decoder tool.

Start by using the “Smart decode” option, which will figure out the type of encoding and decodes it to plain text.
BurpSuite decoder currently supports URL, HTML, base64, ASCII hex, hex, binary, octal, and GZIP encodings as of today.
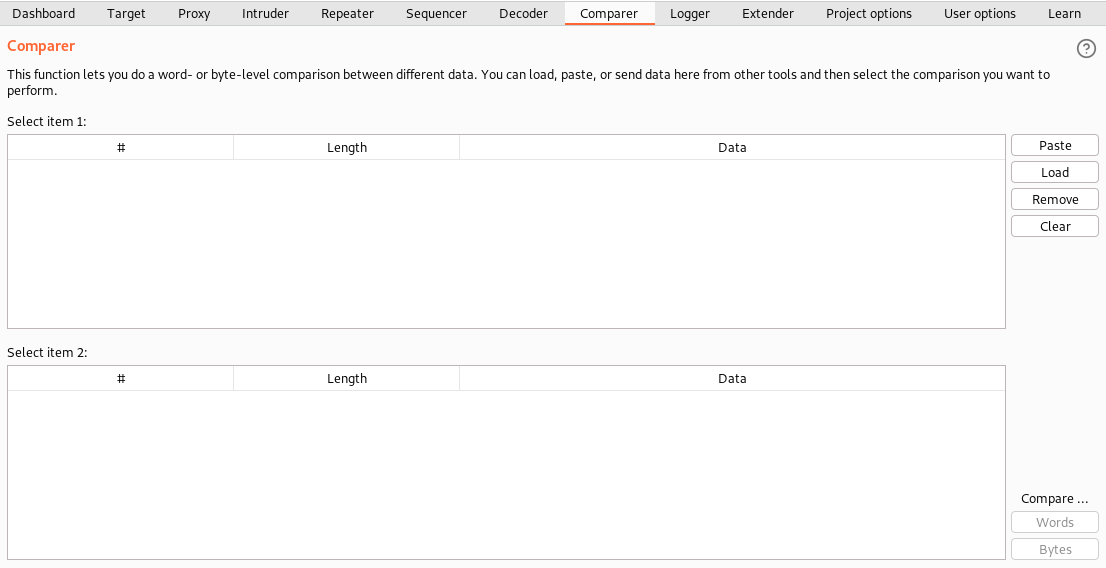
9. Comparer
Comparer lets you view the differences between the two messages of what was modified and what was added newly.
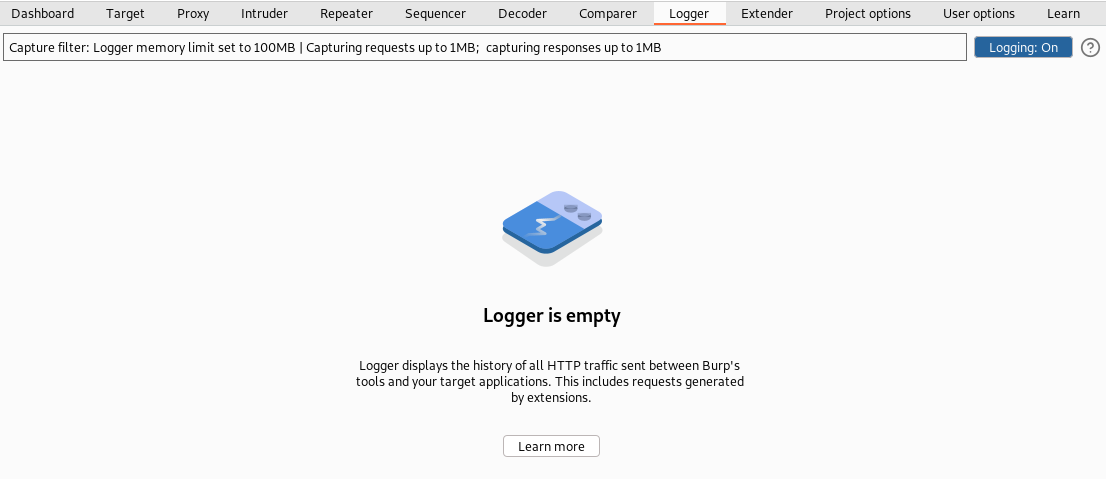
10. Logger
Logger displays all the communication information between your BurpSuite tool set and the target website.
11. Extender
BurpSuite extender gives additional superpowers to expand the capabilities of the current toolset.
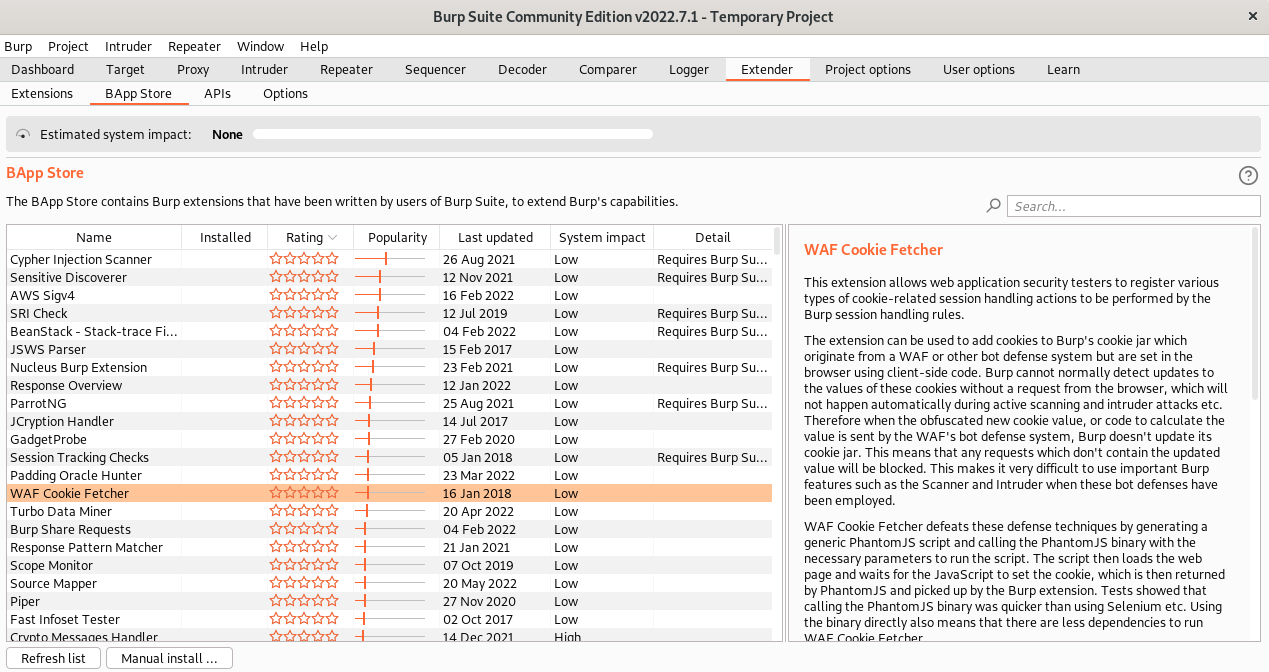
BAppStore is a list of plugins inventory that is provided by portswigger as well as from the security community.
APIs provide us the capability to add custom functionalities based on requirements.
Extensions tab provides you with information about all the extensions which are enabled and their output.
12. Project options
Let's say I want to automate the set of sequential operations which need to be performed with less manual effort. Can I do it?
Yes, you can do that using Macros.
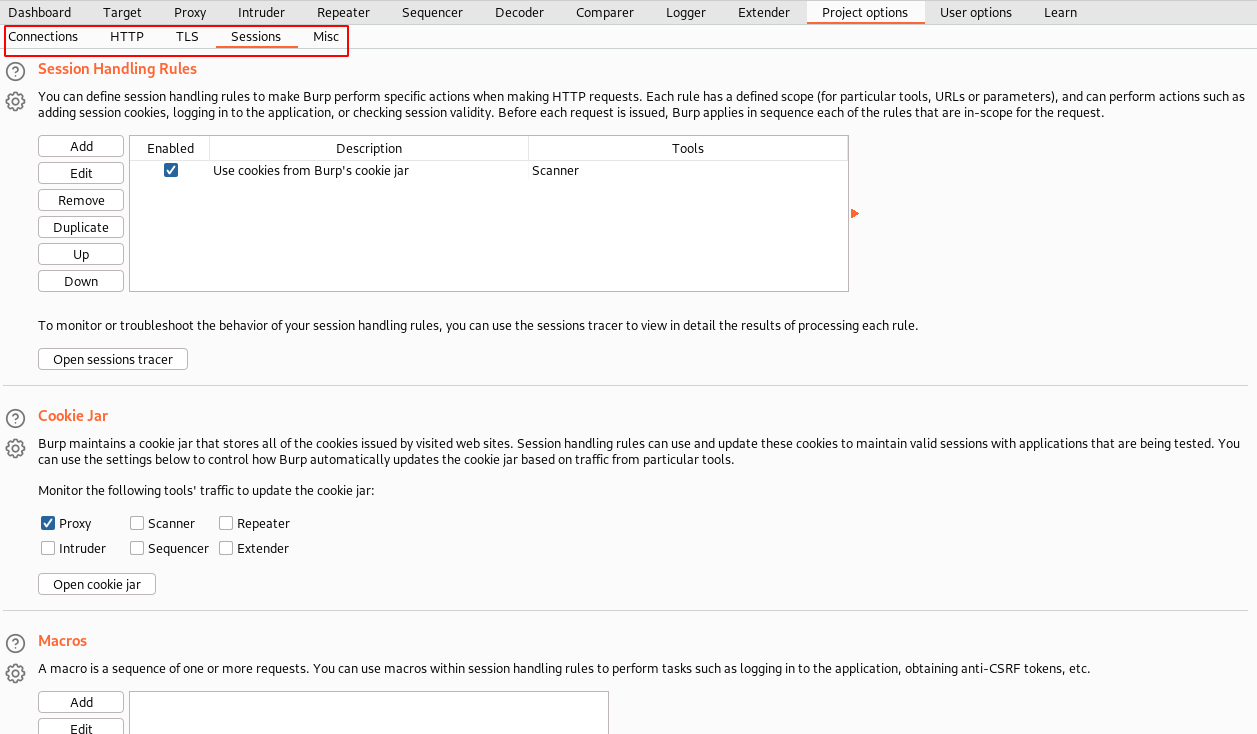
Project options provide you with a lot more benefits to tweak session handling rules, how and where the cookies are maintained, Macros to repeat a sequence of actions based on rules, HTTP communication preferences, etc.
To save all the changes, navigate to the “Project” menu item ⇾ select “Project options” ⇾ “save project options”.
Similar way, you can load the saved options using “Load project options”.
13. User options
These are settings specifically for the user who uses the BurpSuite.
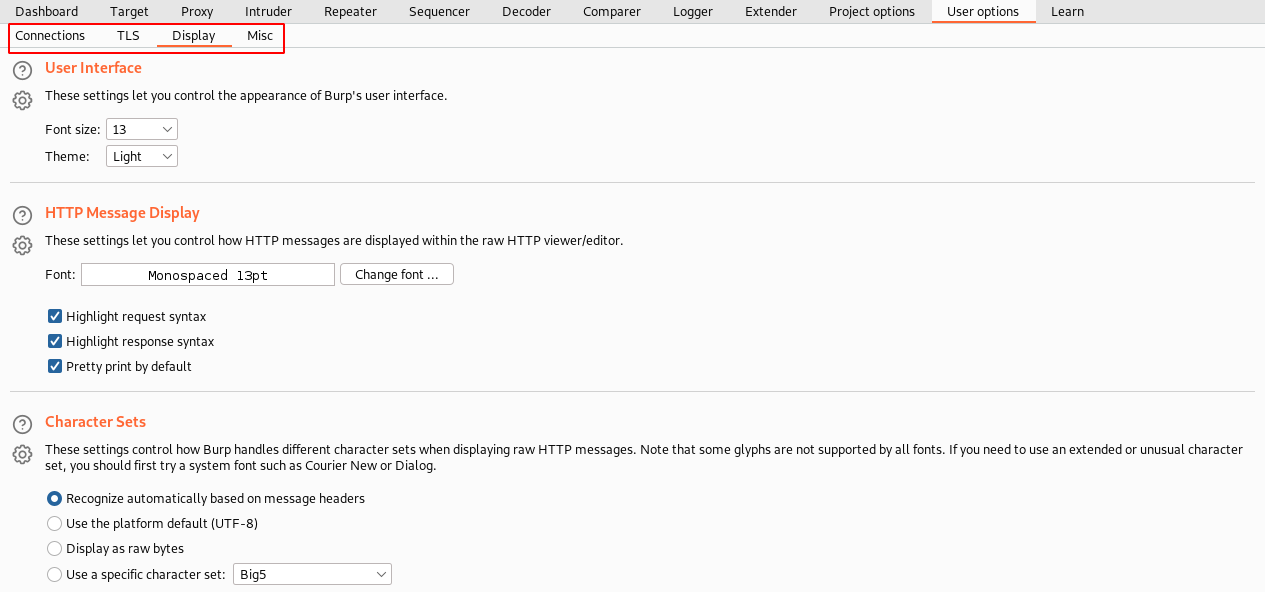
Some options where we are tweaking repeatedly while launching BurpSuite, probably there is a way to save that setting and use it whenever you launch the tool rather than configuring it every time.
Say, you want to change the Interface to how it looks better for you or update shortcut keys, change temporary file location, update communications information, etc.
All about how you want the tool to behave can be updated here.
Lastly, to save all the changes, navigate to the “Burp” menu ⇾ select “User Options” ⇾ “save user options”. Using the same way, you can load the saved options using “Load user options”.
Well, we have covered a good amount of information about the different sections available in the BurpSuite tool.
I hope, by now, you are familiar to navigate and choose different tabs based on requirements.